The No-Stress Family Hiking Guide
📋 Table of Contents
Weekend Basecamp • Family & Kids
The No-Stress Family Hiking Guide: How to Get Your Kids Outside Without Losing Your Mind
Our first family hike lasted exactly 22 minutes before someone had a meltdown. That someone was me. Here’s everything we’ve learned since.
By the Weekend Basecamp team • Updated March 2026 • 22 min read
Our first family hike lasted exactly 22 minutes before someone had a meltdown. That someone was me.
The plan was beautiful. A two-mile loop through a state park, gorgeous photos for the holiday card, the kind of wholesome outdoor adventure that makes other parents nod approvingly on Instagram. The reality: our four-year-old announced she was “done walking forever” approximately 400 feet from the trailhead. Our seven-year-old stepped in mud and behaved as though the earth had personally betrayed him. My wife and I exchanged the look — the one that means “whose idea was this” and also “if you say anything right now I will leave you in this forest.” We turned around, drove home in silence, and ordered pizza.
That was three years ago. Last month, the same two kids hiked four miles along a ridgeline trail, pointed out three different kinds of moss, shared their water bottle without being asked, and declared it “the best day ever.” On the drive home, our daughter fell asleep mid-sentence while describing her favorite rock. It was, genuinely, one of the best days we’ve had as a family.
What changed wasn’t our kids — it was us. We were doing it wrong. Not morally wrong, not bad-parent wrong, just tactically wrong in a hundred small ways that added up to a miserable experience for everyone. We’d packed the wrong things. We’d chosen the wrong trail. We’d set expectations based on what we wanted (a scenic three-hour nature experience) rather than what our kids needed (snacks, control, and a very specific destination they could see). Once we figured out the formula, hiking went from a parenting ordeal to the single best activity in our family’s rotation.
This guide is everything we wish someone had told us before that first disastrous outing. It’s not a fitness guide. It’s not a wilderness survival manual. It’s a deeply practical, sometimes funny, occasionally opinionated breakdown of how to get your kids on a trail and have everyone — including you — actually enjoy it. We’ve tested every piece of gear mentioned here on real hikes with real kids who have real opinions about snack timing. We’ve made every mistake so you don’t have to.
“The goal of a family hike isn’t the summit. It’s the car ride home where nobody is crying.”
Before You Go — Gear That Actually Matters
You don’t need to outfit your family like a REI catalog. But the five items below are the difference between a hike that works and a hike that ends in the parking lot.
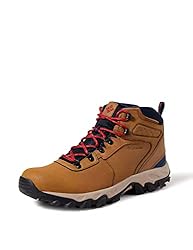
Hiking Boots for the Adults: Your Feet Set the Mood
🥾 Essential 💰 ~$85
Here’s something nobody tells you about family hiking: the parent’s comfort matters more than the kid’s. If your feet hurt, your patience evaporates. If your patience evaporates at mile one, the whole operation collapses by mile two. We learned this after three hikes in running shoes that left us sore, cranky, and short-tempered with kids who were just being kids. Invest in your own feet first.
The Columbia Newton Ridge Plus II (~$85) is the boot we recommend to every parent who asks. It’s not the fanciest hiking boot on the market, and that’s exactly the point. It’s comfortable out of the box — no break-in period, which matters when you’re a parent who doesn’t have three weekends to spend conditioning leather. The waterproof membrane actually works (we’ve tested it in creek crossings and unexpected rain), the ankle support is solid without being stiff, and the tread grips wet rock without making you feel like you’re wearing cement blocks. At $85, it’s roughly a third of the price of the boots the serious hikers wear, and for trails under five miles with kids, it’s everything you need.
Kids Hiking Shoes: Let Them Pick the Color
👟 Essential 💰 ~$40
Kids don’t need hiking boots. They need shoes they’re excited to wear that also happen to grip dirt and survive puddles. We fought this battle early — bought our son a pair of serious little hiking boots that looked adorable and made him walk like a constipated robot. He hated them. The hike was ruined before we left the driveway. The lesson: buy something lightweight and let them choose the color. Buy-in matters more than ankle support when you’re four feet tall and weigh 45 pounds.
The Merrell Trail Chaser Jr. (~$40) hits the sweet spot. They’re light enough that kids forget they’re wearing them, grippy enough for rocky trails, and they come in colors that make children actually want to put them on. The toggle lacing system means no stopping every quarter mile to retie shoes, which alone is worth the price. Our daughter has worn hers through puddles, mud, and one ill-advised sprint through a shallow creek. They survived all of it. Get them a half-size up — kids’ feet grow fast, and you want at least a season out of these.
Merrell Trail Chaser Jr. Kids Hiking Shoe
~$40 on Amazon
The Water Situation: CamelBak Kids Eddy+
💧 Essential 💰 ~$30
Dehydration turns a manageable kid into an unmanageable one in about fifteen minutes. We know this because we’ve watched it happen in real time — one minute everything’s fine, the next minute someone is sitting on the trail refusing to move and declaring that their legs “don’t work anymore.” The fix is simple: make water constantly accessible and impossible to spill. That rules out open-top bottles, cups, and anything that requires adult supervision to operate.
The CamelBak Kids Eddy+ (~$30) is the one we’ve settled on after trying roughly six different options. The bite valve means kids can drink while walking without stopping, the straw reaches every last drop, and the thing is basically indestructible — ours has been dropped off a picnic table, kicked down a trail, and thrown into a car trunk approximately 500 times. It still doesn’t leak. Each kid gets their own, clipped to their belt loop or backpack, and the rule is simple: drink every time we stop, drink every time you see a cool rock, drink every time you hear a bird. Over-hydration is not a thing we’re worried about on a family hike.

The Backpack: Osprey Daylite Plus
🎒 Essential 💰 ~$75
The single biggest mistake we made on our early hikes was distributing gear across three different bags — my backpack, my wife’s purse, a grocery bag of snacks. When someone needed sunscreen, it was in the wrong bag. When someone wanted a granola bar, the snacks were 20 feet behind us with the other parent. Chaos. Everything needs to go in one pack, carried by one person, and that pack needs to be organized enough that you can find the fruit snacks without stopping and excavating.
The Osprey Daylite Plus (~$75) is the pack that solved our problem. It’s 20 liters — big enough for a family of four’s snacks, water, sunscreen, first aid kit, extra layer, and a few surprises, but not so big that you feel like you’re training for Everest. The front mesh pocket is where the current-rotation snacks live (accessible without opening the main compartment — this matters more than you think). The hip belt distributes weight so your shoulders aren’t screaming by mile two. And it has a built-in hydration sleeve if you ever graduate to a water bladder. We’ve used it on over 40 family hikes and it shows zero signs of wear. Osprey’s lifetime warranty isn’t marketing — it’s a genuine promise.
Osprey Daylite Plus Daypack (20L)
~$75 on Amazon
First Aid Kit: Be Ready, Not Paranoid
🩹 Essential 💰 ~$16
You will not need the first aid kit on 95% of your family hikes. You will be extraordinarily grateful for it on the other 5%. A scraped knee at mile one can end the entire adventure if you don’t have a Band-Aid — not because the injury is serious, but because a child who is bleeding, even slightly, has lost all confidence that the outdoors is a safe place to be. The first aid kit isn’t really about medical emergencies. It’s about being the parent who can fix anything, instantly, and restore the vibe.
We carry a pre-packed compact trail first aid kit (~$16) and we’ve added a few extras: children’s Benadryl (for surprise allergic reactions to plants or stings), moleskin for hot spots, and a handful of character Band-Aids, because a Bluey Band-Aid has healing powers that regular Band-Aids do not possess. The whole thing weighs under a pound and lives in the bottom of the Osprey pack. We’ve used it for scraped knees, splinters, a bee sting, and one memorable occasion where the moleskin saved my wife’s heel and therefore our marriage.
Compact Hiking First Aid Kit (66 Pieces)
~$16 on Amazon
Gear up for your first family hike — all the essentials in one cart
Add Hiking Essentials to Cart →
The 5 Rules That Changed Everything
We learned these the hard way. Each one emerged from a specific disaster that we’d prefer not to repeat.
1 Start Shorter Than You Think
Your first family hike should be one mile. Not two. Not “an easy three-miler.” One mile. Possibly less. We know this sounds absurdly short, and that’s exactly why we’re leading with it — because every parent we talk to makes the same mistake we did. You look at a trail description that says “easy, 2.5 miles” and think, “My kid can do that. They run around the house for hours.” Running around the house and walking continuously in one direction through unfamiliar terrain are completely different activities. Your kid has never done the second one. Start small.
One mile gets you out of the car, onto a trail, to a destination (ideally), and back. It takes maybe 45 minutes to an hour with kids, which is plenty of time for them to feel like they’ve had an adventure without hitting the wall. If they’re still energized at the end, fantastic — that’s the feeling you want. A kid who finishes a hike wanting more will beg to go again. A kid who finishes a hike exhausted and miserable will resist the next one with every fiber of their being. First impressions matter enormously. Make the first one easy enough that success is guaranteed.
Our rule of thumb: For kids under 5, plan for one mile. Ages 5–8, up to two miles. Ages 8–12, up to three. These are starting points — your kid might surprise you. But it’s always better to end early and triumphant than to push it and end up carrying a crying child back to the car.
2 The Snack Schedule Is More Important Than the Trail
This is not an exaggeration. You could be hiking through literal paradise — waterfalls, wildlife, panoramic views — and if your child is hungry, they will see none of it. They will see only injustice. The trail ceases to exist. All that remains is a deep, existential grievance about the fact that food is not currently entering their mouth.
We solved this by building snack breaks into the hike as formally as you’d build rest stops into a road trip. Every 15–20 minutes, we stop. Not because anyone has asked — by the time they ask, you’re already in the danger zone. The stops are preemptive. We pull out one snack, everybody sits on a log or a rock, we eat, we look around, we point at something interesting, and then we keep going. The snacks themselves matter too: high-energy, easy to eat, no wrappers that require adult intervention. Trail mix, fruit snacks, granola bars, cheese sticks, apple slices in a zip-lock. We pack roughly double what we think we’ll need, because the surplus becomes a trail currency. “If we make it to that big tree, everyone gets gummy bears.” Bribery? Absolutely. Effective? Without question.
3 Let Kids Lead the Pace
Adults hike to cover distance. Kids hike to explore everything within arm’s reach. These are fundamentally incompatible goals, and the adult goal needs to lose. When we stopped trying to maintain a pace and started following our kids’ natural rhythm, everything changed. Yes, they stop every thirty seconds. Yes, they want to examine every single stick. Yes, they’re going to pick up a rock and carry it for half a mile before abandoning it for a better rock. This is the hike. This is the actual experience. The trail is just the setting.
Letting kids lead also means letting them be in front on the trail. Physically in front. There’s a psychological shift that happens when a child is leading instead of following — they feel ownership of the adventure instead of being dragged through it. Our son went from “are we done yet” to “let’s see what’s around the corner” the day we let him walk in front. He’s been leading ever since. The adult in the rear is doing the real navigation, of course. But the kid doesn’t need to know that.
4 Make It a Treasure Hunt, Not a March
A hike is boring if it’s just walking. A treasure hunt is never boring. We bring a simple scavenger hunt list on every single family hike — printed on a card, laminated (we went through a laminator phase and this is the one product that survived). Items include things like: a feather, a rock with stripes, something red, animal tracks, a mushroom, a pinecone, moss on a tree. The kids check items off as they find them. It transforms the hike from a physical endurance test into a game, and games are something children will do for hours without complaining.
For older kids, we’ve upgraded to photography scavenger hunts. Each kid gets the Fujifilm Instax Mini 12 (~$68) (or takes turns with one camera) and the list becomes “photograph something that looks like a face, something smaller than your thumb, the tallest thing you can see.” The instant photos become a physical record of the hike that kids are weirdly proud of. Our fridge is covered in blurry Instax photos of rocks and trees and one extremely cooperative frog, and honestly, they’re among my favorite family artifacts.
Fujifilm Instax Mini 12 Instant Camera
~$68 on Amazon
5 The Car Treat Is Non-Negotiable
Every family hike ends the same way in our house: we get back to the car, and there’s a treat waiting. A popsicle from the cooler. A bag of chips. A juice box. A cookie. Something that exists exclusively in the context of post-hike reward. The kids know about it before we start. They know it’s there. And on the hard stretches — when the trail gets steep or someone’s legs are tired or the sibling dynamics have deteriorated — the car treat is the lighthouse that guides them home.
This works because it reframes the entire emotional arc of the hike. The ending isn’t exhaustion — it’s reward. The last memory isn’t sore legs — it’s a popsicle in the parking lot with dirt on your face. When we ask our kids if they want to go hiking, they say yes, and we’re fairly confident that 60% of the yes is the car treat. We’re fine with that. Over time, the hiking itself becomes the reward. But at the beginning, you need the popsicle. Don’t skip the popsicle.
Car treat logistics: We keep a small cooler in the trunk with frozen treats and cold drinks. Load it before you leave the house. The 10 seconds it takes to toss in a few popsicles will save you 10 minutes of whining on the return trail.
Trail Types That Work for Families
Not all trails are created equal. Here are the five types that consistently deliver a good experience for parents and kids alike.
Waterfall Trails: The Guaranteed Win
If you do nothing else with this guide, take your family to a waterfall trail. Waterfalls are the cheat code of family hiking. Kids need a destination — something visible, tangible, and exciting enough to justify the effort of walking there. A scenic overlook means nothing to a six-year-old. A waterfall means everything. They can hear it before they see it, which builds anticipation. They can see it from a distance, which creates a goal. And when they get there, they can throw rocks in the water, splash their shoes, and feel like they’ve accomplished something genuinely impressive.
Most waterfall trails are short by design — the waterfall is the attraction, not the walk. Look for trails under a mile and a half, and check the elevation gain. A waterfall at the bottom of a steep descent means a steep climb back, which is the exact opposite of what you want with kids (save the climb-at-the-end trails for when they’re older and more experienced). The best waterfall trails are relatively flat with the falls at the turnaround point, so the walk back feels like a victory lap instead of a punishment. Bring the JBL Clip 4 (~$50) for the walk in — clip it to the backpack, play something fun and low-volume — then turn it off when you reach the falls. The sound of the water is the soundtrack now.

Loop Trails Under 2 Miles: No Backtracking Drama
Out-and-back trails have a fatal flaw with kids: the return trip. You’ve already seen everything. There’s nothing new to discover. The excitement is gone, and what’s left is the same scenery in reverse with tired legs. Loop trails solve this entirely. Every step is new terrain, new things to look at, new discoveries. The psychological difference is enormous — kids (and adults, honestly) hike better when they feel like they’re going somewhere rather than retracing their steps.
Look for loop trails under two miles with gentle elevation changes. State parks are goldmines for these — most have at least one short interpretive loop designed for families. AllTrails is our go-to for finding them: filter by distance (under 2 miles), difficulty (easy), and route type (loop). Read the reviews with kids in mind — a trail that’s “easy” for an adult backpacker might still have a stream crossing or a scramble section that’s challenging for little legs. We also look for loops with built-in rest points: benches, bridges, clearings, or anything that gives a natural excuse to stop and explore.
Nature Center Trails: Built-In Entertainment
Nature centers exist specifically to make the outdoors accessible and interesting for families, and we slept on them for way too long. Most have short trails — usually under a mile — with interpretive signs along the way that give kids something to read, touch, or investigate every few hundred feet. “What kind of tree is this?” has an answer right there on the sign instead of requiring you to fake your way through a botany lecture you’re not qualified to give.
The best nature center trails also have activity stations — things like bird blinds, scavenger hunt checklists built into the trail markers, or small exhibits about local wildlife. These break up the walk into manageable segments and give kids a reason to keep going: “Let’s see what’s at the next station.” Many nature centers are free or inexpensive, and some have indoor exhibits you can explore before or after the trail. We’ve found these to be the ideal first hike for families who’ve never hit the trail before. The infrastructure removes most of the variables that can go wrong, and the interpretive elements give parents an easy script for engaging with kids along the way.
Beach and Coastal Paths: Where Hiking Meets Play
Coastal trails are sneakily brilliant for families because they blur the line between hiking and playing. Walk along the bluff for a while, scramble down to a tide pool, collect shells, keep walking. The trail itself is almost secondary to the environment — kids are so stimulated by the sand, the water, the rocks, and the marine life that they forget they’re exercising. We’ve done coastal walks where our kids covered three miles without a single complaint, simply because there was always something shiny or splashy within reach.
The practical considerations: sunscreen is non-negotiable on coastal trails (apply before you leave the car and reapply at the halfway point), wind can be a factor (bring a light windbreaker for each kid), and footing can be uneven on rocky coastlines. Stick to established paths and keep kids well back from cliff edges. That said, the risk-to-reward ratio on beach trails is outstanding. The combination of fresh air, sensory stimulation, and the inherent novelty of the coastline makes these some of the most reliable family hiking experiences we’ve had.
Rails-to-Trails: The Flat and Friendly Option
If your family includes a stroller, a reluctant hiker, or anyone who’s nervous about rough terrain, rails-to-trails paths are your best friend. These are former railroad corridors converted into walking and biking paths, and because trains can’t climb hills, the trails are essentially flat. Packed gravel or paved surfaces mean no tripping on roots, no navigating rocks, and no mud. They’re as close to a guaranteed-easy outdoor experience as you’re going to find.
The trade-off is that rails-to-trails paths lack the “wilderness” feeling of a traditional hike — you’re often walking through rural or suburban areas, sometimes alongside roads. But for families who are just getting started, that accessibility is a feature, not a bug. Your three-year-old can ride their balance bike while you walk alongside. Your stroller works without being a wrestling match. And because the paths are typically long, you can choose your own distance — walk half a mile and turn back, or go three miles if the kids are into it. These trails are also excellent for bringing bikes and scooters, which transforms the experience from a walk into an adventure. The kids’ bike bell (~$8) is optional but strongly recommended for the joy-to-cost ratio.
Trail day essentials — speaker, camera, and hydration in one cart
Add Trail Day Essentials to Cart →
What to Pack — The Complete Checklist
After 40+ family hikes, this is the packing list we’ve refined down to exactly what we need. Nothing more, nothing less.
Packing for a family hike is not packing for a backpacking trip. You don’t need a water purifier. You don’t need a compass. You need snacks, sunscreen, Band-Aids, and the psychological infrastructure to keep everyone moving forward. We’ve over-packed (the 30-pound bag of “just in case” items that made the hike miserable) and we’ve under-packed (the time we forgot sunscreen and our son looked like a lobster for a week). This checklist is the Goldilocks version — tested, refined, and proven on actual family hikes with actual unpredictable children.
🎒 The Backpack (Load the Night Before)
- Water bottles — one per person, filled and chilled
- Snacks — double what you think (trail mix, granola bars, fruit snacks, cheese sticks, apple slices)
- Sunscreen — SPF 50, applied before you leave, bottle packed for reapply
- Bug spray — DEET-free for kids, applied at the trailhead
- First aid kit — with character Band-Aids, moleskin, children’s Benadryl
- Extra layer — lightweight rain jacket or fleece per person
- Hat and sunglasses — for each kid
- Scavenger hunt card — laminated, with a pencil
- One gallon zip-lock bag — for treasures collected on the trail
- Wet wipes — for hands, faces, and emergency situations
- JBL Clip 4 speaker — clipped to the backpack
- Phone (fully charged) — for trail navigation, photos, and emergencies
🚗 The Car (Load Before You Leave)
- Small cooler with car treats — popsicles, cold drinks, fruit cups
- Change of shoes — for each kid (post-hike comfort)
- Extra socks — mud happens
- Towel — for wet kids, muddy dogs, or emergency picnics
- Trash bag — pack it out, always
- Change of clothes — for the kid who will inevitably find water
The Morning-Of Routine (Our Exact Timeline) →
The Night Before:
8:00 PM — Pack the backpack using the checklist above. Set it by the front door.
8:10 PM — Fill water bottles and put them in the fridge (cold water is more appealing to kids).
8:15 PM — Prep snacks in individual zip-lock bags. Label each kid’s bag with their name.
8:20 PM — Load the car cooler with frozen treats and drinks. Leave it in the fridge overnight.
Morning Of:
7:30 AM — Breakfast. Make it protein-heavy (eggs, peanut butter toast). Avoid sugar crashes.
8:00 AM — Everyone gets dressed. Hiking shoes on before anything else — this prevents the “I can’t find my shoes” delay.
8:15 AM — Apply sunscreen to everyone. Don’t wait until the trailhead — it needs 15 minutes to absorb.
8:25 AM — Grab backpack, grab cooler, grab water bottles from fridge. Load car.
8:30 AM — Leave. Aim to arrive at the trailhead by 9 AM. Morning hikes are cooler, less crowded, and kids are freshest.
At the Trailhead:
9:00 AM — Bathroom stop (every single time, even if they say they don’t need it).
9:05 AM — Apply bug spray. Distribute water bottles. Hand out the scavenger hunt card.
9:10 AM — Trail briefing: “We’re going to [destination]. When we get back, there are popsicles in the car.”
9:15 AM — Start hiking. Let the kids lead.
On the Trail:
Every 15–20 min — Snack and water stop. Mandatory, not requested.
At the halfway point — Longer break. Sit down. Eat a bigger snack. Explore the area.
On the return — Increase snack frequency. Mention the car treat. Use the scavenger hunt to maintain focus.
When Things Go Wrong (And They Will)
The difference between families who hike once and families who hike regularly isn’t luck — it’s knowing how to handle the inevitable disasters.
The Meltdown
It’s going to happen. Maybe at the trailhead, maybe at mile one, maybe at the exact moment you can see the car but your child cannot be convinced of this fact. Meltdowns on the trail are different from meltdowns at home because you can’t retreat to a bedroom or put on a screen. You’re in the woods. With witnesses. And your child is lying face-down on dirt.
Here’s what works for us: first, stop walking. Sit down next to them. Don’t try to reason with a melting-down child — logic has left the building. Don’t bribe yet. Just sit. Often, the simple act of stopping — of communicating “we’re not going anywhere until you’re ready” — releases enough pressure that the meltdown starts to subside on its own. When they’re calm enough to hear you, offer a snack, a sip of water, and a choice: “Do you want to walk, or do you want a piggyback ride to that rock up there?” Choices restore a sense of control, which is usually what the meltdown was really about. The piggyback ride isn’t defeat — it’s strategy. You’re preserving the emotional experience of the hike so there’s a next time.
The Weather Pivot
We’ve been caught in rain exactly three times. The first time, we panicked and sprinted back to the car, which made the kids cry (running in rain is scary when you’re three feet tall). The second time, we’d packed rain jackets and treated it as an adventure — “Hiking in the rain! We’re so tough!” — and the kids loved it. The third time, it was lightning, and we did sprint, correctly. The takeaway: rain is not a reason to cancel or retreat. Lightning is. Learn the difference and you’ve unlocked an entirely new category of hiking days.
The lightweight rain jacket is the gear item that earns its space in the pack on those days. We buy inexpensive kids’ rain jackets from Amazon — they don’t need to be fancy, just waterproof and packable. For the adults, any basic rain shell works. The real preparation is mental: decide before you go that if it rains, you’re staying on the trail unless conditions are genuinely unsafe. Kids take their cues from parents. If you’re calm and cheerful in the rain, they will be too. If you’re cursing and rushing, they’ll absorb every ounce of that stress and amplify it.
”I’m Tired” at the Halfway Point
This is the most common trail complaint and it’s almost never about actual physical exhaustion. Kids have astonishing endurance when they’re engaged — they can run for hours at a playground. “I’m tired” on the trail usually means “I’m bored,” “I’m hungry,” or “I don’t see the point of continuing.” Each of these has a different solution.
For boredom: pull out the scavenger hunt, start a game of I-Spy, or challenge them to find the biggest stick within 20 feet. For hunger: stop and snack. For existential pointlessness: give them a visible goal. “See that big tree? We’re going to that tree. When we get there, we’ll have gummy bears.” Then at the tree: “See that bridge? We’re going to that bridge.” Small, visible goals convert an overwhelming distance into a series of achievable missions. If none of this works and they’re genuinely spent, put them on your shoulders, pull out the JBL Clip 4, play their favorite song, and walk back as a team. No shame. You still got outside. That still counts.
Bug and Sun Protection
Sunburn and bug bites are the two most preventable problems on a family hike, and they’re the two that will most reliably ruin the next three days. We apply sunscreen at home, 15 minutes before departure, which gives it time to absorb before sweat and activity start breaking it down. We reapply at the halfway point. We use SPF 50 for kids — anything less is a gamble we’re not willing to take. Bug spray goes on at the trailhead, not before, because nobody wants to ride in a car that smells like DEET.
For bug protection, we use DEET-free spray on the kids (picaridin-based formulas work well and smell less terrible) and regular bug spray on the adults. Long pants and long sleeves are the most effective bug barrier, but good luck getting a seven-year-old to wear pants in July. The compromise: lightweight sun-protective shirts with sleeves, paired with whatever shorts they’ll agree to wear. Ticks are the real concern in wooded areas — do a full tick check when you get back to the car, paying special attention to hairlines, waistbands, and behind ears. Make the tick check a ritual, not a scare tactic. “Let’s check for hitchhikers!” works better than “Let me see if a disease-carrying insect has embedded itself in your scalp.”
The sun shirt trick: We buy kids’ UPF 50+ long-sleeve sun shirts (~$18) in fun colors and call them “adventure shirts.” They provide better sun protection than sunscreen, they protect against scratches from brush, and because we only use them for hiking, the kids associate putting them on with going on an adventure. It’s Pavlovian, and it works.
Sun and bug protection bundle — everything for a worry-free trail day
Add Protection Essentials to Cart →
Bonus Gear: Making Memories Stick
The hike itself matters. But the things that help you remember it matter almost as much.
Trail Music: The JBL Clip 4
We debated this one for a while. Purists will argue that hiking should be a quiet, nature-immersive experience, and they’re not wrong — for adults. For kids, especially on the walk-in portion of the hike, a little music transforms the energy entirely. We’re not talking about blasting speakers through the woods. We’re talking about the JBL Clip 4 (~$50) clipped to the backpack at low volume, playing the kids’ favorite playlist. It sets a pace, it lifts the mood, and it gives everyone a shared experience. We turn it off when we reach the destination or any time we want to listen to the forest. It’s a tool, not a soundtrack. Used correctly, it’s one of the best $50 we’ve spent on family hiking gear.
The Clip 4 specifically: it’s waterproof (IP67), the carabiner clip is built into the body so there’s nothing to lose or break, and the battery lasts 10 hours. We’ve had ours for over two years and it’s been rained on, dropped in a creek, and coated in trail dust. Still works perfectly. Still sounds surprisingly good for something smaller than a tennis ball.
The Trail Camera: Fujifilm Instax Mini 12
We mentioned this in the scavenger hunt section, but it deserves its own moment. The Fujifilm Instax Mini 12 (~$68) has become as essential to our family hikes as water and snacks. There’s something about instant film that captivates kids in a way that phone photos don’t — they hear the click, they hear the whirr, and then a physical photo slides out that they can hold and watch develop in real time. It’s magic every single time. Our kids fight over whose turn it is to take the next photo, which is the exact kind of problem you want on a hike.
Film costs roughly $0.75 per shot, so each hike runs about $8–$10 in film. That’s the cost of a mediocre latte, and what you get in return is a stack of imperfect, charming photos that capture the hike in a way phone photos never do. The slightly washed-out colors, the occasional thumb in the frame, the unexpected composition of a seven-year-old’s perspective — these photos have more personality in a single frame than anything in our camera roll. We keep them in a shoebox labeled “Hike Photos” and looking through it has become its own ritual.
The memory-making bundle — speaker + camera for trail adventures
Related Articles
- 25 At-Home Date Night Ideas That Actually Feel Special
- The Game Night Guide: How to Host an Evening People Actually Want to Come To
- The Weekend Camping Checklist That Changed How We Pack
- 15 Backyard Activities That Actually Tire Kids Out
- The Family Road Trip Survival Guide: Snacks, Stops, and Sanity
Frequently Asked Questions
What age can kids start hiking?
Kids can start “hiking” as soon as they can walk steadily — typically around 2 to 3 years old. At that age, you’re really doing a short nature walk (a quarter mile, maybe half a mile). Bring a carrier or hiking backpack for when they’re done walking. By 4 or 5, most kids can handle a mile on a gentle trail with frequent snack breaks. The key is managing expectations: a two-year-old’s hike is a 15-minute exploration of whatever is immediately in front of them. That’s perfect.
How do I find kid-friendly trails near me?
AllTrails is our go-to resource. Filter by difficulty (easy), length (under 2 miles to start), and route type (loop if possible). Read the recent reviews — parents often mention stroller accessibility, tricky sections, and whether the trail is appropriate for young kids. Your state’s parks and recreation website is another excellent resource. Most state parks have at least one family-friendly interpretive trail. Local Facebook parenting groups are surprisingly useful too — other parents in your area have already done the scouting work.
What if my kid absolutely refuses to hike?
Don’t force it. Seriously. A forced hike creates a negative association that can take months to undo. Instead, start with something that doesn’t feel like hiking: a walk to a playground through a wooded path, a trip to a nature center, or even just exploring a creek behind your neighborhood. Build positive outdoor experiences gradually. The word “hike” carries weight for some kids — try “adventure walk” or “treasure hunt in the woods” instead. Rebranding works better than you’d expect.
How much water should we bring for a family hike?
The general rule is 8 ounces per mile per person. For a one-mile family hike with two adults and two kids, that’s about 32 ounces total — roughly two standard water bottles. We always bring more than the formula suggests, because kids drink unpredictably and spillage happens. For a two-mile hike, we bring a full CamelBak Eddy+ per kid (14 oz each) and a liter bottle for each adult. On hot days, double everything.
What’s the best time of day for a family hike?
Morning, every time. Between 8:30 and 10 AM is our sweet spot. Kids are rested, fed, and at peak energy. The temperature is cooler, the trails are less crowded, and you’re home in time for lunch and naps. Afternoon hikes can work in cooler months, but in summer, the combination of heat, post-lunch sluggishness, and fading patience makes mornings the clear winner. We tried evening hikes exactly once. The mosquitoes had opinions.
Do we need hiking poles for kids?
No, but a walking stick they find on the trail is essentially the same thing and infinitely more exciting. Every kid wants a walking stick. Let them pick one out early in the hike — it gives them something to do with their hands, provides a small amount of stability on uneven ground, and doubles as a pointer for the scavenger hunt. If your child is hiking on steep or rocky terrain regularly, kid-sized trekking poles exist and run about $20, but for most family hikes on easy trails, the free forest stick works perfectly.
“The best family hike is the one where everyone wants to do it again.”
Three years ago, we couldn’t make it 400 feet without a meltdown. Last week, our daughter asked if we could go hiking “every single weekend forever.” We said yes. Then we loaded the cooler with popsicles, packed double the snacks we thought we’d need, let the kids pick the trail, and drove to the trailhead with the JBL Clip 4 playing their favorite playlist. Nobody cried. Everyone laughed. It was a Tuesday.
Family hiking isn’t about epic summits or Instagram-worthy overlooks. It’s about being outside together, moving at a pace that works for the smallest legs in your group, and building a collection of shared memories that smell like sunscreen and taste like parking lot popsicles. Start small. Pack snacks. Let them lead. You’ve got this.
Weekend Basecamp is reader-supported. When you buy through links on our site, we may earn an affiliate commission.
© 2026 Weekend Basecamp. All rights reserved.
Ready to shop the full kit?
Browse on Amazon →All links include our affiliate tag (weekendbasecamp-20). Prices may vary.